Lighting Autocob grow with big sm0 and mephisto.

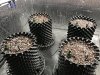
Partial autocob harvast.


The colors are crazy. Damn phone camera sucks! There is deep red and purple in the buds closest to the lights.
IMG_2569.JPG


This was a lower hidden bud. No color but green and yellow from a delayed

IMG_2572.JPG


Red hubbabubba buds. Chunky and dense with a little red lol.
IMG_2573.JPG


IMG_2574.JPG


IMG_2575.JPG


IMG_2576.JPG
 
How those blumats treating you? Dialing them in is touchy at first but it's not bad once u get it down.

Was just going to do an update on them bro. You are absolutely right. Trying to dial them in I suppose. I did have a few that were dripping from the bottom and some pots dry. I'd say 2-4 days of adjusting is all that's needed. This takes no more than 5 minutes for 20 pots. Plus I'm inexperienced and that's taking a bit extra.

Watering usually takes 1-2 hours 3-4 days a week even with the sick setup I have. Today I filled the res and double checked the drippers and I'm done for a whole week. This took less than an hour.

Another thing is I noticed a phosphorus deficiency on a few of the faster, more advanced plants. I had filled 30gallons so I just added an extra 6tsp of kool bloom in which us 0-10-10. Now I just wait for the 3hour mark when the pump kicks on and refills the upper res and next time they need water they will get the nutrients they need. Only way I can describe it is that it's like an easier version of hydro. I WILL NEVER EVER GROW A PLANT IN THESE TRAYS WITHOUT A BLUMAT. Unfortunately I don't grow all my plants at the same stage so there will be a few without the system but the rest will. Over the moon [HASHTAG]#blumatforlife!![/HASHTAG]
 
Here's the method to my madness Just saturate the crap outta the pots w blumats installed but turned off.Wait at least an hour for the excess water to drain off and blumats to react to the moisture. Then open till they flow a stream and dial them down to a drop clinging to the end. Open just a hair til a lil baby drop falls to ensure its on the cusp of dripping and then back down ever so slightly till the cling on drop is acheived. Give it a few days to see if they are at the mostuire level desired and move them up or down a notch. Then it's smooth sailing. Ur set up looks stellar bro!
 
I think u were right about the intensity of the citizen cobs. FML !!! It was the autocob that led me to the decision to use them.
I'm considering a potentiometer inline after my power supplies to drop my wattage now.....Blew the old cxa3050s i used to run away by a long shot!!!
 
Here's the method to my madness Just saturate the crap outta the pots w blumats installed but turned off.Wait at least an hour for the excess water to drain off and blumats to react to the moisture. Then open till they flow a stream and dial them down to a drop clinging to the end. Open just a hair til a lil baby drop falls to ensure its on the cusp of dripping and then back down ever so slightly till the cling on drop is acheived. Give it a few days to see if they are at the mostuire level desired and move them up or down a notch. Then it's smooth sailing. Ur set up looks stellar bro!


Thank you for that. No one tells you that you need to water first. It makes sense now but I didn't get it at first. I'm sure Well im hoping others wondered the same thing too lol.

Just set up the AutoCob room with blumats as well. Different ages plants in here need a different reservoir. Hopefully this helps people see how simple a setup actually is.

First you would need a reservoir. This was $6.98 at home cheapo. I choose it as it's ridgid plastic and shouldn't deflect over time. It's 12 gallons. Smaller than I wanted but fits and makes a nice little table.

The bottom right is where I added the water line bulkhead. $4 piece from sustainable village. The table is pitched forward too to help drainage of this res and any spills on the
IMG_2672.JPG

Small air stone inside to keep it fresh and oxygenated.
IMG_2673.JPG


8mm line across the back wall. Higher than the pots. I also put a slight pitch in it too to help drain.
IMG_2669.JPG


Not necessary but the additional 6 dollars to run each line separately is worth it. Nice push to connect tee's and shut off valves.
IMG_2670.JPG


Right down to the $7 carrots. Wet the pots to the desired moisture, turn till you see a hanging drop on the end of the line, then tighten the brown adjuster on top of the carrot back 1/4 turn. Now all that's needed is to keep the reservoir filed. There is absolutely no waste this way. Nutrient adjustments can be made instantly as the res is the feed.
IMG_2669.JPG
 

Attachments

  • IMG_2671.JPG
    IMG_2671.JPG
    294.9 KB · Views: 70
This setup could have been done for around 60 dollars including the high shipping price. The water lines are 3mm and 8mm. Not standard stuff at HD so you do need to buy it from them. 10' is like 10$ which is a bit higher.

This way cost me $85 including everything. Same price a 2 for $20 dinner at Applebee's lol. Hit me up if you guys and gals need assistance or call sustainable village for advice and setup design. I'm expecting to save around 8-9 hours a week of work in both rooms now. The big room is also setup and it's working flawlessly!!

IMG_2548.JPG


IMG_2641.JPG
 
This setup could have been done for around 60 dollars including the high shipping price. The water lines are 3mm and 8mm. Not standard stuff at HD so you do need to buy it from them. 10' is like 10$ which is a bit higher.

This way cost me $85 including everything. Same price a 2 for $20 dinner at Applebee's lol. Hit me up if you guys and gals need assistance or call sustainable village for advice and setup design. I'm expecting to save around 8-9 hours a week of work in both rooms now. The big room is also setup and it's working flawlessly!!

View attachment 785092

View attachment 785093
I always like seeing an organized grow area. Good job.
 
Back
Top