Fast Buds Perpetual Water Only Fast Buds Mix

What garden you got going on!!

They all look great!!

I'll be curious to know how the Orange Sherbets go for you in the end.
Thank you so much for your recognition! I absolutely love your genetics with a little love they really can put out quality smoke and lots of it!

Here is a shot of a Orange Sherbet girl at day 39 above ground.
C5FC419A-ECF4-42E6-9FC7-4F19ABFED02C.jpeg
 
Chop Day 6 shooter!!
DD81CC07-DB82-4546-8351-00BF326DAC6A.jpeg

EA836BF0-6617-426E-AFD9-CC8A3AB27B7F.jpeg 1112A8D6-8587-4F84-9B11-9AA50CCA627B.jpeg Heavy girl easily over 4 oz dried maybe even 6 oz. we will see!

In contrast to the chop, a girl the same age this pretty Fast Buds Skunk plant still blowing up with weight some of the branches are starting to droop.
10AC0CA9-B7CF-4984-AC36-6A5284437827.jpeg

07D7A428-4A44-4648-8DBD-33A9637DE481.jpeg AC33185B-74D6-4054-911C-1D8524DBB3C8.jpeg Luckily I have plenty of room so I don’t feel like I have to rush her.

Finally my 2 Sherbet seedlings seem to be dried out enough to water the have lost the yellow tinge coming from the center of the plants have come back to green. So they both recieved a 1/2 gallon of or water spiked with fish and seaweed. Watered in slowly at first to be sure the peat pot is drenched inside.
B5DCA159-2F0C-464E-AC36-F126909184C2.jpeg
 

Attachments

  • F375BDA5-E954-4628-9815-60DD85447195.jpeg
    F375BDA5-E954-4628-9815-60DD85447195.jpeg
    1.7 MB · Views: 35
Very busy today being change over Saturday. Every 3rd is full of chopping, moving and planting to keep things on track.
F514C1C7-7F04-4FCB-A916-17B0FB88E300.jpeg I’ve got the 2 freebie gelato on the left. The skunk girl is at least going to run another week, she’s turning more yellow than I like if I had known how long she was going to run I would have top dressed more hot soil. The Cream Cookie is almost done already, I’m going to let her run longer than I normally would for some sleeping medicine.
7514BA04-7C04-443E-9E45-A9796D4C786F.jpeg The young adults are moving along fine with the bell of the ball being Orange back right.
3985A30B-E417-4C76-8756-826E7AD2861C.jpeg Just waiting for seeds to pop to fill the holes and keep on rolling.
 
Checking in this morning I was able to plant the 3rd new baby, I should be able to plant the last one tomorrow. Then I moved on to normal duties.
60A3A157-7FBA-4D94-BA96-E1D27C11E920.jpeg Since this freebie Gelato flowered so late in life I decided to go ahead and top dress 1 more time trying to make sure it doesn’t run dry at the end like the yellowing Skunk next to her.
3FC7FAEF-5EB6-4E3A-9A34-8980C5E1A4E6.jpeg 9446F909-879A-455A-B5C7-4CE81C3CA995.jpeg I’ve been throwing shade at the freebie pair but this one is moving along nicely throwing some nice frost already. Shouldn’t be such a snob I just have never been let down by Fast Buds, I run a tight ship and they keep it that way.
C6CBBE59-BBAB-4A03-8F95-8FBBA5709279.jpeg

E7130CFF-05BD-4B2A-A93C-AEDCCD9CEE13.jpeg2A71F42A-E161-4846-8F0B-F4E762C4E05B.jpeg Yes she’s my fav right now, did a little defoil to the Orange girl today.
A4B5C639-F3F0-4261-AE77-FB529E5C9EF5.jpeg EF475AC1-296E-48B9-9C90-0E60D2636B80.jpeg Defoil’ed the Lemon Pie girl and the CBD Crack also this morning. Defoil at this age means cutting all of the branch starts below and close to the top rim of the pot, anything hanging below the pot line is gone, also walk up the main stem of the plant pulling the leaves from the major branch starts trying to open up the middle. I’ll do some LST at this time just to open them up more. Plants like the Orange and the Lemon will require another thinning out later on in life, but the little CBD is probably set for life.
 
One of the challenges of being a good soil grower is knowing when to water. I stumbled on a pretty cool trick that takes out all of the guess work and lifting pots.
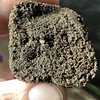
B50F00BF-1C38-45C2-8391-2233856C7C4C.jpeg ACFC0DB2-DD1D-4D3A-ACED-3F7B74490927.jpeg B865F5E1-77B5-4B26-981D-DA3F4EC381A3.jpeg 5CD0FEEF-95E9-4DA1-BC25-E37703D11A9A.jpeg Burying a peat pot in your pot gives you direct access to how wet the dirt is in middle of the pot. The peat acts as a wick and by giving the edge of the peat a touch you can tell, cold and wet (soil saturated), wet but room temp (soil drying out not ready), feels dry but peat still pliable ( can be watered but better to wait). peat pot hard (she’s thirsty).
 
7B8B0265-0FA8-4A97-AC5B-60E638A8FC7F.jpeg

checking in on everybody only the skunk girl needed any water.
0D895BF4-80E4-4022-B762-6CEC5041C195.jpeg

all of the adults were thirsty, peat pot dry as a bone.
5F996D4A-C9B2-4D07-AAAE-20A509CF946C.jpeg Did take note that the Strawberry Pie girl got a little burned up from the top dress. She will be fine just some crispy leaf tip and a little twisting. Kind of a necessary evil the top dress I do that to expand root growth to the top of the pot.
E7DC2E08-2DEF-459B-BD32-46CBBE8AAFEE.jpeg

The two Lemon AK were thirsty and the Orange girls not quite ready. I’ve got three of the four seedlings up, just waiting on the last one.
 
Can’t work in the garden this morning I have people coming over to work on the house and I broke my RO filter deal waiting on Amazon now for the replacement. So I thought I would share my planting procedure. I try to use to soil that is a little damp soil that is to dry is a pain in the wazoo.
85DF5D55-7F22-47C1-9895-75D7A843FD25.jpeg 66201FDB-25DC-4045-A51D-F4CD7DBA4835.jpeg I have my mixed dirt in the tote on the right and on the left is soil removed from the pots after harvest roots, peat pots, papertowel all of it. I put in 2 1/2 gal. of hot soil in the bottom and 2 1/2 gallons of the other on top.
B5D478CC-0F19-406B-9E69-C0697945A33E.jpeg 1CBAC0B3-612A-487A-88F8-ADB9112FA75B.jpeg 0F2C3668-B146-46FA-95CA-75A9F53A34EB.jpeg 85D20D34-DCEF-467A-A2DE-A8ADF97BF995.jpegTake my 5” peat pot, use a drywall screw to make extra holes in it. I just need the pot to hold seedling soil not keep roots in. Fill the little pot with seedling soil.
ED254327-D87B-44C2-9AD7-B46BBC64390B.jpeg C321668E-2B2B-4B35-8E41-C48FD994F60F.jpeg E15428F5-F73D-494C-BA95-70C705C9EF84.jpeg I push my finger in the seedling soil to create a hole for the root plug. Sprinkle worm casting and mycorrhizae products in the hole. Tear apart the plug a little to help get the seed down in the plug easier.
6A686A2A-7A3D-49F1-B17F-3DB9AF0A2F66.jpeg EE89F2A0-CA42-4606-A24E-76E8E1ADCF43.jpeg 66684B21-DE5F-48C9-BAFD-4B6E558B0396.jpeg Here is the tricky part. Per Fast Buds instructions the seeds sit in RO water till they pop then get transferred in the peat plug. It’s very tricky making the transfer from water to plug just be careful. Once I get the seed transferred very carefully point the little foot down in the plug with just the very top of the seed showing. Stick the plug in the hole fold up paper towel to cover the soil. And carefully water the little pot with a half gal. of water. Set the big pot in a drip pan with cut up plastic hanger in the bottom, and your done. Planting the seed this way can result in the seed casing not coming off properly. When this happens remove the seed casing only after you get it wet (without watering) drip water on it leave for a minute drip a little more and the casing will come right off.
 

Attachments

  • EF556914-530C-4C1E-82DD-CAB0E47A3E1B.jpeg
    EF556914-530C-4C1E-82DD-CAB0E47A3E1B.jpeg
    1.3 MB · Views: 29
Checking in this morning, I was able to get the RO unit hooked up and I was able to water last night. The last seedling is above ground, the newest batch will be 2 Fast Buds Lemon Pie, and 2 Fast Buds Gelato.
463BAEF6-6CC5-4C3C-A683-479638015463.jpeg

582F0787-7CCF-426F-B835-6AE0FF044E28.jpeg

84677367-AA4A-4024-9F17-F7128245D4FF.jpeg
 
Back
Top