Bob's Journey into Hybridisation and Genetics - For Dummies

Gooday to you all :toke:


I've been preparing everything to separate the two female's from the rest of the crew. Don't want a repeat like in the greenhouse, lol.
So yesterday I called my local kitchen appliances store and asked if they had a cardboard box from a large fridge lying around...
It was a large box, but had no top or bottom. That's usually where the Styrofoam sits. So I cut the flaps and folded a top and bottom.
Taped everything nice and shut and then made a rudimentary door.
View attachment 1641419

To prevent the door from opening inwards I stickytaped a piece of leftover cardboard to the side.
View attachment 1641420

This morning I continued on my little DIY project...
I wanted to add a layer of mylar so the light could bounce around optimally, even though the ladies will be in here for a couple of days, I still want to treat the well. They will be taking care of the offspring so they are as important as the ladies that are going to get me stoned 👌

Now installing the mylar was kinda impossible to do with the box as it was. So I cut the whole damn thing open, layed it flat on the floor and sprayed an entire can of sprayglue over the carboard. After opening the windows the glue was dry enough for the mylar to be applied. This went a whole lot easier.
Ok, I'll admit...I won't be working in a carshop applying tinted foil, but it'll do the trick :thumbsup:

Afterwards I folded and taped the box back up. Added two pieces of electrical wire as hooks for the light and gave everything a testrun.
View attachment 1641421

View attachment 1641422

While looking around in the box I accidentally bumped the cardboard doorstop and knocked it off. So this had to be mounted more securely. Added some woodglue and a couple of clamps. By tomorrow it'll be dry and strong enough for me to bump against ;)
Also cut off the lower right corner so I had a place to thread my electrical wiring through. The lower clamp is preventing the view.
View attachment 1641423

This is my first growlight, from before @Marshydro was so kind as to help me out. Haven't forgotten you my friend :cheers:
View attachment 1641425

This setup consists of three 50W 220/110V~ each cooled by a CPU fan recuperated out of the many old pc's, meant for thrash, we had lying around at work. Three colors or bandwidths as they say. Cool white, Blurple and warm white.
View attachment 1641426


Hopefully this will be enough to keep my babymama's happy for a couple of days...
How long do you keep 'm separated from the others @Sawney_bean? And you shower them before you put 'm back didn't ya?


Regards,

Bob :toke:
ingenious.

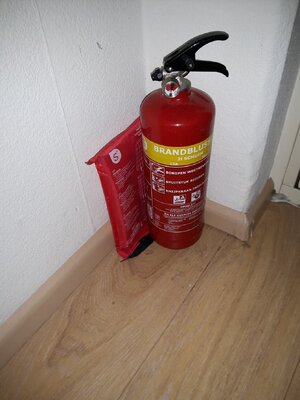
but just to be safe you might make sure the fire extinguisher is at correct pressure, you know, jic.
 
@WildBill, thanks for the rep dude :cheers:

ingenious.

but just to be safe you might make sure the fire extinguisher is at correct pressure, you know, jic.
Thanks for the concern buddy! It is better to be safe then sorry. I already have a smoke alarm in the study as I do my 3D printing there, but a fire extinguisher...Let's go to the shop. :thumbsup:
 
@WildBill, thanks for the rep dude :cheers:


Thanks for the concern buddy! It is better to be safe then sorry. I already have a smoke alarm in the study as I do my 3D printing there, but a fire extinguisher...Let's go to the shop. :thumbsup:
growing in an apartment I feel its a must,

IMG_20231026_134648.jpg
 
@Antonio_DutchPassion, thanks for the rep. It sure is cheap. Just spent 2.5€ for a bottle of spray glue, the rest I had laying around, except for the box ofcourse. But a friendly word can do wonders ;)
The only hard thing is, keeping the box out of view of my kids. They saw the cardboard yesterday and already wanted to build something with it themselves...If they see a ready build house, with a door and mirrored walls inside lit up by chandelier...I'm one growtent poorer, lol
Luckily this is only for a couple of days. I think Sawney said two, but I'm not sure.
Afterwards, I'm unfolding it and keeping it behind the closet for another adventure. 👌
good job you dont have a cat or you would really be in trouble.... :crying:
 
Gooday to you all :toke:


I've been preparing everything to separate the two female's from the rest of the crew. Don't want a repeat like in the greenhouse, lol.
So yesterday I called my local kitchen appliances store and asked if they had a cardboard box from a large fridge lying around...
It was a large box, but had no top or bottom. That's usually where the Styrofoam sits. So I cut the flaps and folded a top and bottom.
Taped everything nice and shut and then made a rudimentary door.
View attachment 1641419

To prevent the door from opening inwards I stickytaped a piece of leftover cardboard to the side.
View attachment 1641420

This morning I continued on my little DIY project...
I wanted to add a layer of mylar so the light could bounce around optimally, even though the ladies will be in here for a couple of days, I still want to treat the well. They will be taking care of the offspring so they are as important as the ladies that are going to get me stoned 👌

Now installing the mylar was kinda impossible to do with the box as it was. So I cut the whole damn thing open, layed it flat on the floor and sprayed an entire can of sprayglue over the carboard. After opening the windows the glue was dry enough for the mylar to be applied. This went a whole lot easier.
Ok, I'll admit...I won't be working in a carshop applying tinted foil, but it'll do the trick :thumbsup:

Afterwards I folded and taped the box back up. Added two pieces of electrical wire as hooks for the light and gave everything a testrun.
View attachment 1641421

View attachment 1641422

While looking around in the box I accidentally bumped the cardboard doorstop and knocked it off. So this had to be mounted more securely. Added some woodglue and a couple of clamps. By tomorrow it'll be dry and strong enough for me to bump against ;)
Also cut off the lower right corner so I had a place to thread my electrical wiring through. The lower clamp is preventing the view.
View attachment 1641423

This is my first growlight, from before @Marshydro was so kind as to help me out. Haven't forgotten you my friend :cheers:
View attachment 1641425

This setup consists of three 50W 220/110V~ each cooled by a CPU fan recuperated out of the many old pc's, meant for thrash, we had lying around at work. Three colors or bandwidths as they say. Cool white, Blurple and warm white.
View attachment 1641426


Hopefully this will be enough to keep my babymama's happy for a couple of days...
How long do you keep 'm separated from the others @Sawney_bean? And you shower them before you put 'm back didn't ya?


Regards,

Bob :toke:
3/4 days until I see all the pistols turn and show its seeded.
I don't spray them or shower them , just a good shake every day to remove excess.
I have a bathroom with extractor fan I pollinate in .
Looks good mate .
 
@St. Tom, thanks for the rep buddy. I'm better...let's keep it at that for now ;)

3/4 days until I see all the pistols turn and show its seeded.
Okidoki 👌

I have a bathroom with extractor fan I pollinate in .
I was thinking, mind you I've consumed a complete Werther's original, on putting each girl in a large 20L binbag filled halfway up with air and then blow in the pollen somehow. Then shake the bag vigorously...this way I could create an enormous air movement inside the bag without getting pollen everywhere.
What do you guys think?

ingenious.

but just to be safe you might make sure the fire extinguisher is at correct pressure, you know, jic.
My missus showed me where the fire extinguisher is :face:
Luckily I'm a lazy stoner and didn't go to the store today as I already went out to get the spray glue. Hééé Hoooo....🙌
I did get a bit paranoid so I went checking every fifteen minutes or so and while my missus is still angry at me, I felt I could do worse then stay inside the study the rest of the evening...
While sitting among all them electronics and sensors. I quickly soldered together a Lolin D1 and a SHT30 (temp/humid) sensor together. Uploaded some code I wrote earlier to the device and Bob's your uncle...
1698342451358_small.jpg


Inside the box the sensor is peeking through a hole and is locked in place by a locknut. :thumbsup:
1698342527617_small.jpg


1698342527607_small.jpg
 
Back
Top