I know i am often lacking in space in my setup and I can't fit as many 7" pots in my setup as I want, so if I start a bunch of regular non femmed seeds I simply cannot fit enough pots in my small space. I started using "instatransplant" pots a few seasons ago and had excellent results using the technique. I found that you would get little to no stunting when growing an auto in a 6" pot for 21 days. A few advantages come with an instatransplant pot. First it allows a totally stress free transplant. Extremely low risk of shifting dirt, and no risk of a poorly timed transplant, as the "windows" in the side of the pots allow you to monitor your root development, so a transplant too late or too early is super easy to avoid, by keeping an eye on root development.
This 6" instatransplant pot had an autoultimate growing in it for 21 days and then was transplanted to the outdoors.


Here she is at the end of her life.


So for this application the instatransplant pots work extremely well!! I started using the instatransplant 16oz cups for a different reason. 2 seasons indoor ago, thanks to the advice of master stunter @arty zan, I was showed the way. With his advice i found that keeping roots restricted in cups for a certain amount of time would root restrict and I would end up with smaller plants.
This is the last thing that most guys would want, except for the few with limited vertical and unable to grow tall plants as a result of their vertically challenged space. For me, it opened up a whole slew of strain options that I would have been previously unable to grow due to height. I also found that cramming in smaller plants and focusing main colas to keep nodes stacked and plants stout(I also believe that close proximity LEDS with IR spectrum play a roll in overall height and node spacing), I was able to increase overall space versus yield ratios, along with getting the benefit of being able to grow 7-8 strains at a time which increases variety immensely!!
How much stunting would i need to do to keep plants in check with my space? There is several factors I needed to take into account. First of all breeders quoted sizes, and also grow journal results are taken into account. If DP's auto night queen is quoted to 36" and i need to have plant at a maximum of 26", then I need to do something, or she will outgrow the space(assuming i do a perfect job growing her out, and the plants genetics are just right for a big lady).
I also keep an eye out on early growth rates as well as root development, and take those into account. If a plant is growing slowly, and after 14 days(especially if into preflower) she is not very large, I will often jump the gun and plant her then, even if she is supposed to be a large(r) strain.
If early plant growth is quick and I feel the plant could reach typical quoted sizes, I use this as a general guideline for plants that preflower at 15-21 days.
1-7 days contained in the 16oz cup = no effect on size
8-11 days contained in the 16oz cup = minimal effect on size
12-16 days contained in the 16oz cup = moderate effect on size
17-21 days contained in the 16oz cup = major effect
22 days+ contained in the 16oz cup = maximum effect, that should only be reserved for the latest preflowering plants or for the largest plants you want to greatly reduce the size.
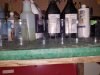
Making the instatransplant cups is super easy....all you need is an ultra sharp knife like an X-acto blade and some plastic cups.
Step 1: Drilling bottom root access holes
ahh one thing i forgot to do when taking pics for this tutorial. Before you do anything else, it is easiest to drill your bottom holes for easy root access and drainage. I forgot to do this step for the pics, but what i do is put a whole stack up cups together and then i use a drill with a 1/4" drill bit and drill a series of 4 holes in the bottom of the stack of cups. If you have a drill press this task is even easier, but a regular drill will work fine as well. The reason i do this as step one, is because you lose a certain amount of structural integrity once you cut the window out and the cups can buckle. Easier to drill first thing.
Tools of the trade(also need a drill and a 1/4" drill bit not shown in pic), ready for action!! A redneck razor blade and a cup ready to become insta!!

Step 2 : Horizontal Cuts
Cut a horizontal cup around an inch wide, at the bottom and top of the cup

Step 3: Vertical Cut
Use you blade for a vertical cut. Start at the corner of your horizontal cut

Slice down the cup, so the cut meets the corner of your lower vertical cut.

Folding back the one side will make the second cut a snap.

Repeat the process 4 more times and you will end up with this.....

Once you have made a few of these cups, and have full control over your knife you might want to give the banana slot technique a go instead of the 4 slot technique. This might be a bit hard to explain. All I do is start near the top using a vertical cut into the cup, and once you get near the bottom of the cup you can rotate the angle of the blade creating a small circular cut, which when done right will allow you to be cutting vertically back up the cup toward the top, and ready for another small circular cut to finish the "slot". Once you master this technique, speed of making these is vastly increased.
Root restricted for 21 days DP auto Euforia

"Not for a Free Weed country or continent, but for a Free Weed World, Unite and Grow, for a Better, Kinder Planet"
912GreenSkell
This 6" instatransplant pot had an autoultimate growing in it for 21 days and then was transplanted to the outdoors.
Here she is at the end of her life.
So for this application the instatransplant pots work extremely well!! I started using the instatransplant 16oz cups for a different reason. 2 seasons indoor ago, thanks to the advice of master stunter @arty zan, I was showed the way. With his advice i found that keeping roots restricted in cups for a certain amount of time would root restrict and I would end up with smaller plants.
This is the last thing that most guys would want, except for the few with limited vertical and unable to grow tall plants as a result of their vertically challenged space. For me, it opened up a whole slew of strain options that I would have been previously unable to grow due to height. I also found that cramming in smaller plants and focusing main colas to keep nodes stacked and plants stout(I also believe that close proximity LEDS with IR spectrum play a roll in overall height and node spacing), I was able to increase overall space versus yield ratios, along with getting the benefit of being able to grow 7-8 strains at a time which increases variety immensely!!
How much stunting would i need to do to keep plants in check with my space? There is several factors I needed to take into account. First of all breeders quoted sizes, and also grow journal results are taken into account. If DP's auto night queen is quoted to 36" and i need to have plant at a maximum of 26", then I need to do something, or she will outgrow the space(assuming i do a perfect job growing her out, and the plants genetics are just right for a big lady).
I also keep an eye out on early growth rates as well as root development, and take those into account. If a plant is growing slowly, and after 14 days(especially if into preflower) she is not very large, I will often jump the gun and plant her then, even if she is supposed to be a large(r) strain.
If early plant growth is quick and I feel the plant could reach typical quoted sizes, I use this as a general guideline for plants that preflower at 15-21 days.
1-7 days contained in the 16oz cup = no effect on size
8-11 days contained in the 16oz cup = minimal effect on size
12-16 days contained in the 16oz cup = moderate effect on size
17-21 days contained in the 16oz cup = major effect
22 days+ contained in the 16oz cup = maximum effect, that should only be reserved for the latest preflowering plants or for the largest plants you want to greatly reduce the size.
Making the instatransplant cups is super easy....all you need is an ultra sharp knife like an X-acto blade and some plastic cups.
Step 1: Drilling bottom root access holes
ahh one thing i forgot to do when taking pics for this tutorial. Before you do anything else, it is easiest to drill your bottom holes for easy root access and drainage. I forgot to do this step for the pics, but what i do is put a whole stack up cups together and then i use a drill with a 1/4" drill bit and drill a series of 4 holes in the bottom of the stack of cups. If you have a drill press this task is even easier, but a regular drill will work fine as well. The reason i do this as step one, is because you lose a certain amount of structural integrity once you cut the window out and the cups can buckle. Easier to drill first thing.
Tools of the trade(also need a drill and a 1/4" drill bit not shown in pic), ready for action!! A redneck razor blade and a cup ready to become insta!!
Step 2 : Horizontal Cuts
Cut a horizontal cup around an inch wide, at the bottom and top of the cup
Step 3: Vertical Cut
Use you blade for a vertical cut. Start at the corner of your horizontal cut
Slice down the cup, so the cut meets the corner of your lower vertical cut.
Folding back the one side will make the second cut a snap.
Repeat the process 4 more times and you will end up with this.....
Once you have made a few of these cups, and have full control over your knife you might want to give the banana slot technique a go instead of the 4 slot technique. This might be a bit hard to explain. All I do is start near the top using a vertical cut into the cup, and once you get near the bottom of the cup you can rotate the angle of the blade creating a small circular cut, which when done right will allow you to be cutting vertically back up the cup toward the top, and ready for another small circular cut to finish the "slot". Once you master this technique, speed of making these is vastly increased.
Root restricted for 21 days DP auto Euforia
"Not for a Free Weed country or continent, but for a Free Weed World, Unite and Grow, for a Better, Kinder Planet"
912GreenSkell
 .
.
 Haha nice!
 .
.