Indoor Adventures with Shallow Water Culture

@MrOldBoy "...is doable and will create a competition between themselves, so I’ve heard but I’ve never tried myself."

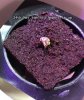
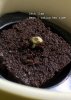
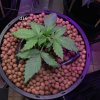
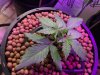
That has pretty well nailed my entire philosophy, not just with dope but with life. On a whim I looked up on google if it's possible to grow more than one plant in a pot. I was amazed to discover almost nothing on this and what there was all said the same things. Here's a typical dialog from the Rollitup...

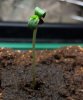
OP: After months of research I have found little on this, I am crammped for space, not for pots for lights, Could I put 3 plants in 1, 5 gallon pot. What problems would this cause. My grow is CFL so I am also worried about them sharing the light to.

Person 1: no u can't.

Person 2: Yeah, that's probably not a good idea. You're setting yourself up for a hard fall due to a whole raft of problems caused by overcrowding.
Think it over

OP: thats all I needed to know , Thanks

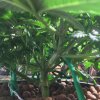
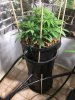
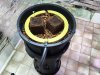
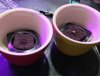
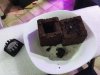
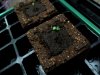
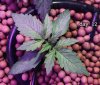
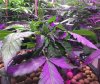
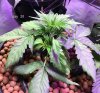
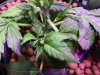
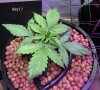
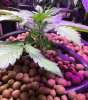
For an indoor LOS Grow with two plants, minimum size pot would be 15 gallon but 20 gallon preferred ...... As for nutrients I don’t see any issue in 15-20 gallon pot but for sure in five gallon pot, even with just one plant, not enough soil - you’ll need to feed in your waterings ....

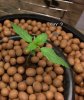
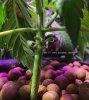
Hydro I have no clue .....

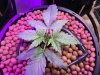
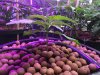
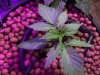
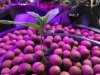
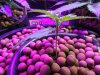
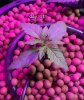
Outdoors you’ll see the much larger 150 gallon pots used and they will have 8-10 plants in them ...... Number of plants per pot and yield achieved will always be better when larger pots are used, to a point .....

Peace,
OB
 
In my current grow I had a seed that germinated two plants in a 3 gallon. So far I haven't had any issues and they are both developing good sized buds.
 
I'm gradually getting caught up. At least I'm taking photos and my previous photos have been invaluable so I'm more focussed on what I want to capture. It's the end of week 5 now and before I do the update on the Three In One Pot, or how they got from here IMG_3786.jpg to here IMG_5170.jpg IMG_5171.jpg I will bring Orange Bud up to date because she had a scrog refit yesterday and I think I have a plan. I will also update MobyDickXXL which was the Glueberry replacement.

But that's not all, I won the MarsHydro TS-2000 and I dropped a couple of ThinkBig mars.jpg so I'll be documenting those lights for the entire grow and maybe do one topped and one untopped, I'll start updating that next week.

When last we saw Orange Bud I had just installed the sticks for the self supporting scrog. I decided to use one of my prototypes that didn't work out and reappropriate it for a pre scrog, it is very thick, heavy and rounded so I could lower it down onto the plant and let it's weight push everything down, and I supported it with the wire. This is a big improvement as it's very gentle on young shoots. It also gives me a chance to push it around a bit before I'm quite sure what to do. Yesterday however it was time to put the proper scrog in. The first thing I do after taking the pre scrog off is to let the plant free itself up a bit except for the bits that are tied down and reappraise the situation.freed up .jpg

As it turned out the pre scrog was based on a circular pattern so it just seemed to be easier to let the top two grow through that, but as the week went on it became clear that this could be a useful idea.d27-before.jpg So that has become my vision for this girl, two large main colas completely surrounded by a lower flattish level of smaller colas. I'll be trying out 15Litre pots for these instead of the 27L ones I'm currently using. I know these are capable of producing a pound each of quality bud, but what I'm going for with these is to see if I can improve on the quality. That last Think Big is great to have behind me but I think I'll only be growing small plants now, under six zips. Maybe use the larger pots for multiple plants and smaller pots for single plant experiments.

I lowered the new scrog in place just above the canopy to assess the situation lower.jpg and decided to cut the middle wire to ease it around the plant.IMG_5094.jpg It's now just sitting above not doing anything yet while I think about this some more. I had a chance to have a look at the roots and they are looking splendid, very white with lots of fine bits. IMG_5081.jpg

Coming Next: Three In One Pot, update.
 

Attachments

  • IMG_5075.jpg
    IMG_5075.jpg
    77.1 KB · Views: 43
  • IMG_5089.jpg
    IMG_5089.jpg
    116.2 KB · Views: 50
  • IMG_5080.jpg
    IMG_5080.jpg
    52.6 KB · Views: 51
  • IMG_5079.jpg
    IMG_5079.jpg
    127 KB · Views: 44
Last edited:
Very cool, looking good :thumbsup:

I did all this way back, but in Aquafarms with coco rather than clay. I had 5 plants in an Aquafarm once actually Think Big too lol, and it panned out to about the same yield as 1 single big plant I thought, but a lot more attention needed, bonsai style. Same thing with a 2 plants. It was fun, but not THAT much fun to do it again haha

Good way to get to grips with all sorts of training and pruning though.
And I probably did something wrong, so it'll be interesting to see how you get on and what you think :cool1:

Cheers man, yes, you are tuned into exactly what I'm doing. I didn't even know that automatics existed a year ago so for me it's like I died an went to heaven. I'm just growing for myself so yep, I'm going for bonsai, cutesy, but I also want to work on quality. But I'm keeping it really simple to check things. So nothing but GH MicroGroBloom.

Interestingly I germed two Think Bigs for the Mars grow. I tried a new method which I think is about as perfect as it's possible to get as it germed a small undeveloped grey seed. So I decided to put both of them into on pot. I've arranged them with their branches pointing the same direction.

What I did different this time is that I didn't soak the beans overnight but instead just soaked for a few hours, probably none would have been fine. Then I mashed up the hole with a needle on a 1" eazy plug. I figured that these eazy plugs are at least as good as a paper towel and there's no transplant, they cannot dry out or get waterlogged.

I discovered that planting these small plugs in a lot of pellets allowed the plant to be dragged around quite a lot. However as I discovered with my fucked up glueberry, the fine roots can get damaged. So this time I've put the 1" plug into a larger plug. These are a different consistency and tougher. So you can see what I've done here.

Now what is going to be very interesting here, is, is the bad seed IMG_4810.jpg with the weak looking seedling, going to be able to recover or will it remain pissy. If that small seed does not perform as a normal Think Big, then I will know to never bother with bad looking seeds again.

I wasn't able to inspect the seed until yesterday and the seed that popped first [HASHTAG]#1[/HASHTAG] I assumed was the big seed, but it wasn't it was the small seed The big seed undulated underground then burst out late and overtook the other one. It also is dark green and the other one is pale.

I'm naming the Orange Bud "The Two Towers"
 

Attachments

  • 27th-potted-a.jpg
    27th-potted-a.jpg
    177.7 KB · Views: 33
  • 27th-potted-b.jpg
    27th-potted-b.jpg
    195.9 KB · Views: 34
  • IMG_5025.jpg
    IMG_5025.jpg
    157.2 KB · Views: 40
  • IMG_5026.jpg
    IMG_5026.jpg
    176.3 KB · Views: 40
  • IMG_5027.jpg
    IMG_5027.jpg
    112.5 KB · Views: 35
  • IMG_5040.jpg
    IMG_5040.jpg
    117.4 KB · Views: 28
  • IMG_5133.jpg
    IMG_5133.jpg
    66.7 KB · Views: 30
  • IMG_5145.jpg
    IMG_5145.jpg
    145 KB · Views: 31
  • IMG_5146.jpg
    IMG_5146.jpg
    43.4 KB · Views: 32
  • IMG_5205.jpg
    IMG_5205.jpg
    103.9 KB · Views: 30
  • IMG_5208.jpg
    IMG_5208.jpg
    88.2 KB · Views: 29
  • IMG_5209.jpg
    IMG_5209.jpg
    56.4 KB · Views: 28
  • IMG_5210.jpg
    IMG_5210.jpg
    66.8 KB · Views: 31
  • IMG_5217.jpg
    IMG_5217.jpg
    140.6 KB · Views: 30
Last edited:
How to make a shallow water culture for a tent:

3 x 25L stacking tubs
1 x 19mm elbow
1 x 19mm grommet
1 x 13mm straight joiner

1 x metre of 13mm tubing
1 x halo
1 x small pump
25L clay pellets

This is so easy you simply need to look at the photos.


The stacking tubs are the kind that put in one way they fit inside each other and turned the other way they stack, due to the asymmetrical layout. No lids are required. No air pump is required, it's only 21" high and the reservoir is underneath. However to get to the reservoir for maintenance you simply unplug 13mm tube and lift the top two tub together. The roots do not go into the reservoir.

The white tray goes at the bottom of the middle tub to keep the top tub about 4" off the bottom.

Clay pellets, this is important as it's an integral part of how this is all meant to work. However these are permanently reusable and you do not lose any, you recover the lot, very easy to do in a bath because they float to the top and the old bits of root and stuff sinks to the bottom.

The reservoir is not so small that you'll have problems, remember that in addition to the lower reservoir there's a another few litres in the middle tub, this is the "shallow pool" part.

As you can see the 19mm drain elbow can be turned upwards when lifting the top two tubs so nothing spills, it's the little things like this that make it so good. You can also easily use an separate reservoir and just have the top two sitting on a milk crate.

IMG_5439.jpg
IMG_5446.jpg
IMG_5454.jpg
IMG_5428.jpg
height.jpg
middle-tub.jpg
stacked-with-clay.jpg
drain.jpg
close-up-1.jpg
stacked-finished.jpg
bottom-tub.jpg
1.jpg

 
OK there's no pretending any longer, I admit it, I'm just a stoner at heart, so I'm just going to post updates in the order that I get around to it. However I hope gradually add a table of contents to the first post.... anyhoo... Quick update, the two Think Bigs I was growing for the Mars 2000 light test, are deceased. More on this later, some very useful information was gleaned.

@newgrower2018 my MDXXL is up, hey I just realised it's all Roman numerals that's like 1,530

Gonna do a quick update first on Moby Dick this was my glueberry replacement. She started out strongly IMG_4439.jpeg and the first week was normal IMG_4775.jpeg she looks strong so I decided to make this my first normal grow to see what she does. This one started to thicken the lower stem before the upper stem which is unusual and made her very rigid and strong.
 

Attachments

  • d14b.jpg
    d14b.jpg
    170.6 KB · Views: 28
  • d14.jpg
    d14.jpg
    183.7 KB · Views: 31
  • d13.jpg
    d13.jpg
    161.4 KB · Views: 29
  • d13b.jpg
    d13b.jpg
    160.7 KB · Views: 28
  • d8.jpg
    d8.jpg
    121.2 KB · Views: 33
  • d9.jpg
    d9.jpg
    91.5 KB · Views: 31
  • d10.jpg
    d10.jpg
    58 KB · Views: 28
  • d11.jpg
    d11.jpg
    161.8 KB · Views: 31
  • d11a.jpg
    d11a.jpg
    127.9 KB · Views: 31
  • d12.jpg
    d12.jpg
    173.5 KB · Views: 29
Last edited:
Week three for Moby Dick XXL. Somehow I resisted the almost overwhelming urge to top her remembering that it's about time I see what these plant do on their own. The first branches seemed to be growing out well d15.jpg not much happening elsewhere. The next pair were shooting up by the next day d16.jpg however by day 19 the whole plant was energetic but not really wanting to take off, the lower branches on some plants are piddly, these ones were weak and I thought it was best to get rid of them now. I managed to tuck two leaves so no defoliation needed yet, however by day 21 she looks topped, but she is not. d20b.jpg

I've put a heater in her reservoir to keep it up to 22 at night, as it's getting a bit chilly.

IMG_5572.JPG
 

Attachments

  • d21.jpg
    d21.jpg
    200.4 KB · Views: 42
  • d20.jpg
    d20.jpg
    183.3 KB · Views: 31
  • d19c.jpg
    d19c.jpg
    95.2 KB · Views: 34
  • d19b.jpg
    d19b.jpg
    158.8 KB · Views: 34
  • d19.jpg
    d19.jpg
    106.5 KB · Views: 34
  • d17b.jpg
    d17b.jpg
    173.1 KB · Views: 35
  • d17.jpg
    d17.jpg
    148.7 KB · Views: 30
  • d16b.jpg
    d16b.jpg
    124.9 KB · Views: 30
  • d15b.jpg
    d15b.jpg
    164.5 KB · Views: 29
Last edited:
Very cool work man, nice system that'll grow monsters.

Here's what my simple shallow water trays are doing, sadly without any pumps but I'm a simple bloke lol

First 6 auto amnesia in 3 l pots, 5 weeks old and just starting to flower. I got a QB board in there too, a Samsung 301 with extra red running 128 w from the wall, so there's 3 different light sources in this tent
CameraZOOM-) 310520190829-picsay.jpg
CameraZOOM-) 310520190832-picsay.jpg
CameraZOOM-) 310520190831-picsay.jpg


Some photos, Amnesia, gorilla glue and NLxH, these are in 12 l pots, most are 6 weeks old and 10 days from flipping
CameraZOOM-) 310520190821_1-picsay.jpg
CameraZOOM-) 310520190820-picsay.jpg

And this a another low level photo affair, two 6 L hangpots with a simple 2 L reservoir at the bottom, and a nice float level indicator haha, they were vegged almost 8 weeks before flipping with the others 10 days ago, the big one drinks 3 L daily now, and just starting to show their girly bits
CameraZOOM-) 270520190014-picsay.jpg
CameraZOOM-) 270520190015-picsay.jpg
 
Last edited:
Back
Top