Maybe I was expecting too much... anyway, onward and forward!

from this 10.jpg
So, it’s time to start a new grow I guess, looking at the European energy situation I can only see electricity prices going in the wrong direction, so I had better get some stash in place while I can.

I will, for the first time, venture into the world of Auto’s, because, well, you know, why not.

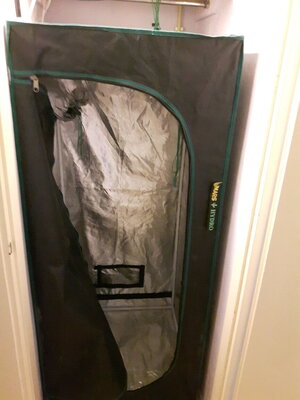
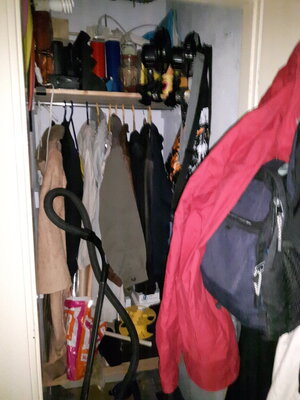
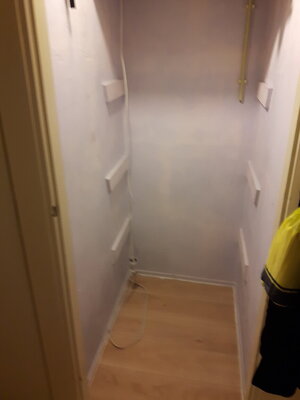
I grow in a cupboard in a small apartment, its quite stealthy because, well, its in an apartment block and I have a lot of neighbours and there are legal things to consider too.

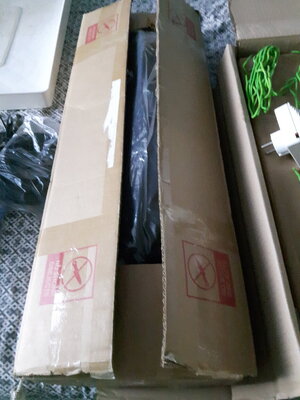
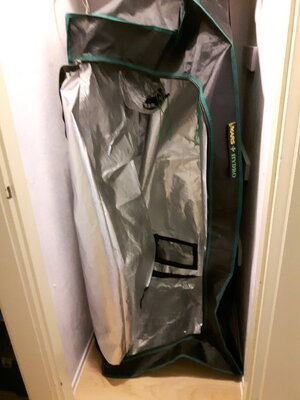
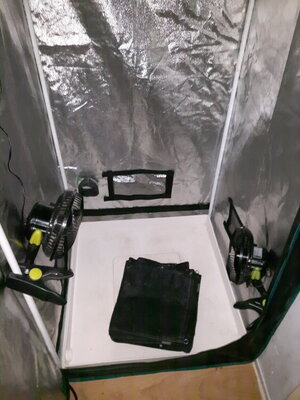
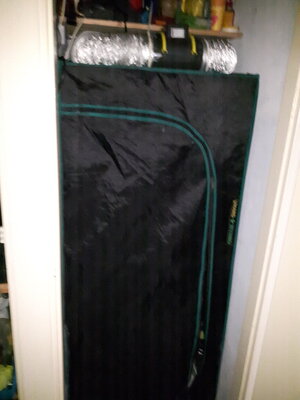
My tent, a marshydro 70x70x160 is such a tight fit that I have to actually build it in the cupboard, ‘cos it will not fit through the door frame, and so I have about 2cm eitherside when installed.

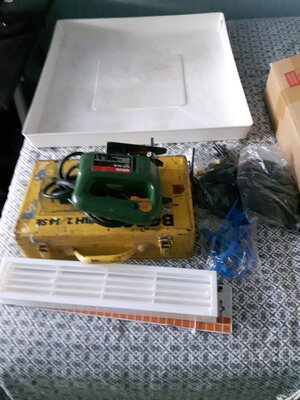
There is a 1cm gap under the door for air flow, this of course means airflow isnt great, so I will be installing a ventilation grill at the bottom of the door (wish I had thought of that years ago) and I will be lifting the tent off the ground a couple of cm’s to allow better airflow to the tent vents at the sides and rear. Hopefully this will give more airflow, keep the temps down and generally improve the grow environment.

My light,

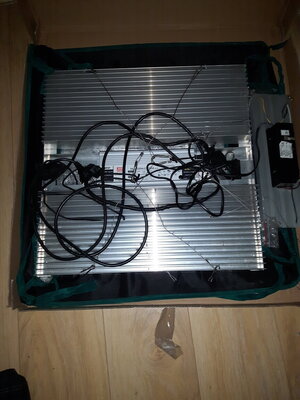
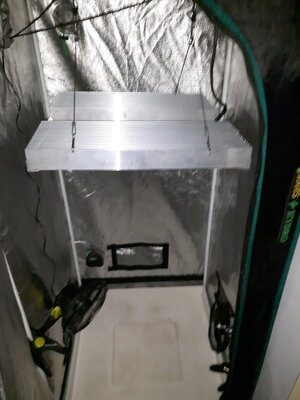
Self made with Citizen CLU048-1212’s and a HLG-320H-C1050A, I can connect 4-6-8 cob’s in different configs (35k,57k,27k) upto 320watts

Seeds autos:

https://www.dutch-headshop.eu/forbidden-runtz-auto-cannabis-seeds-fast-buds x5 eur 55

https://www.dutch-headshop.eu/auto-gorilla-cookies-cannabis-seeds-private-label x5 eur 22

Why these two? short plants, high THC, good Yield, in a small space, seems like a match.


3 reused grow bags, 1 bucket (2+2 each seeds for comparison, (and cross seed??)) will see what happens.

Plan for Scrog/LST depending on how the plants grow.

3 coco blocks - soaked and expanded in full dose nutes. eur 3

4 way drip system on 2 rear or all 4 pots? eur 12

Bio nutes, do I need nutes with good soil????? eur 10

2 x 40ltr soil + 1x 10ltr eur 11

2 x10ltr perlite eur 16

Cal-mag, jic eur 5

Root stim eur 12

Litmus Ph test strips eur 11

coloidal Silver 500ppm eur 18

Door vent eur 13


setup tent:
3-4 wood strips to lift bottom of tent for air flow
Set tent forward 20cm to leave more air space at rear.
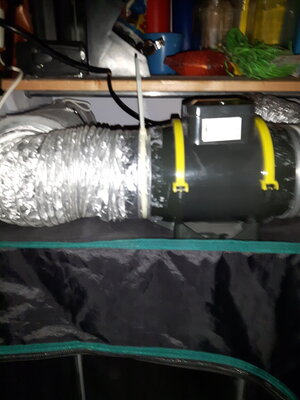
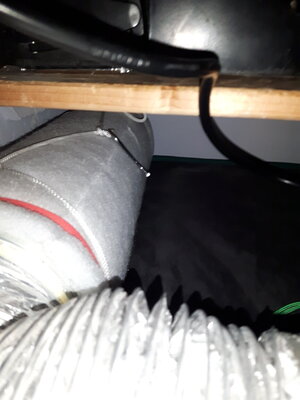
Fan and filter on top outside of tent, Check this for good air flow and aroma stealth, or revert to filter in tent .
Put air vent in bottom of door, took longer to carry up the drill and saw than to actually do the job.
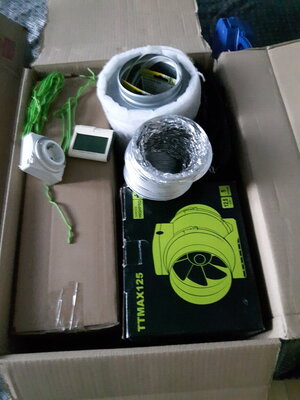
from this.jpgfrom this0.jpgfrom this1.jpgfrom this2.jpgfrom this3.jpgfrom this5.jpgfrom this6.jpgfrom this7.jpgfrom this9.jpgfrom this 10.jpgfrom this 11.jpgtop.jpgtop-filter.jpgtop-outlet.jpgVent-10mins done.jpg

Comments

I noticed that having the side and rear vents open for airflow allows a shitton of light to escape the tent, the vent at the bottom of door looks like a beacon....

So rather than close the vents and restrict airflow, I did a little mcgyvering.

As I have a large plastic dishwasher drip plate at the bottom under the pots/bags, I never use the supplied bottom extra layer thingymagicwhatchmacallit? No idea what its called or its real purpose, except to keep things clean...

Any way, I cut 4 holes 1 for each pot, set my 4 way drippers and now i am just waiting for the beans to pop.... waiting.... waiting....

By the way, this works perfectly, lots of air flow, almost no light leakage, not enough to catch with my phone camera, gotta be happy with the simple things.... now about those beans popping......

.IMG_20230928_175409.jpgIMG_20230928_175429.jpgIMG_20230928_175436.jpgIMG_20230928_175454.jpgIMG_20230928_175502.jpg
 
Last edited:
I think I see signs of life... but I have patience...

In the mean time I mapped my lamp at 30cm with 4 cobs @120watts and again at 30cm with 8 cobs @ 200watts

You know, as you do while waiting for beans to pop above ground.

Also added an extra airvent hole in the middle of the bottom thingymagigwhatchamacallit

4 cobs @120w.pngScreenshot_20230930-111356_PPFD Meter.pngIMG_20230930_112213.jpg
 
well, 1 popped, 1 is trying, 5 days, I am not at all impressed.

IMG_20231001_054656.jpgIMG_20231001_055446.jpg

ah, there is still hope, i did a little digging and found life. hope is all I have at this moment.


:confused1:IMG_20231001_060434.jpg

I now have them sitting under my starter light, 2x 5700k citizen CLU048-1212 @ 45watts, (running off one of the drivers from my long dead mars 700) approx 35cm, PPfd 500-ish dli 49-ish according to my phone S5neo using ppfd app (not nearly 100% accurate, but consistant) https://ppfd.app/

I may actually have placed the seeds in the expanding starter blocks before the blocks had fully expanded, which led to the seeds been a little too tightly held.... my fault entirely.

I would take a pic but the camera shows lots of dark lines flowing across the screen, meh!
 
Last edited:
Seems like these 4, 2x 42fastbuds Forbidden Runts and the 2x private label Gorilla cookies is a failed start,
1 GC might survive... anyways thats a lesson learned and 30 euro down the drain.

one of the Gorilla cookies might come through, might.... dropped the other 3 x 42fastbuds Forbidden Runts Eur 11 ps, in some distilled water and will try again.

I will comment that all the fastbuds seeds look very pale skinned, "In a photo seed" I would consider seeds this pale to be NOT really viable. But, As its my 1st time with Auto's and the first seeds failed maybe I am just looking for excuses???

IMG_20231002_080334.jpg
 
Last edited:
While the 3 Forbidden runtz soak (2 have sunk already).... I have seen some recovery under the starter lamp, 1 Forbidden Runtz and 1 gorilla Cookies are actually opening up, 50% success rate isnt good but its better than I was looking at last night.

5 mins later all 3 of the soaking FR's have sunk to the bottom... about 7 hours of soak. I put them between a couple of wet pads and incubate in another hour or so.


IMG_20231002_145137.jpg
 
Last edited:
2 out of the 3 of the soaked forbidden runtz have split, which I hope is a good sign ;-)

the two under the starter lamp seem to be slow but surviving.... so it all seems to be walking forward.

IMG_20231003_082828.jpgIMG_20231003_082855.jpg
 
so, after a poor start I now have 3 more forbidden Runts in cups. sprouted roots and planted in cups this morning.
and
1x forbidden Runts
1x Gorilla Cookies
already beginning,

Just gotta relax, roll a bone and put my feet up for a week or so, see where it leads.

This isnt a great start to my first Auto grow, but I guess if it all went perfectly I wouldnt learn anything.
1st pic is 24hrs after 1st cracked shell, second pic is 2 sprouts, 2 dead?, 3 new transplants.

Sitting under my starter lamp, 2 citizen clu048-1212's, 5700k @ 47.9 watts

you can see that one of the tap roots has already made its way into the soft pad, that was a bugger to tease out.

IMG_20231004_072115.jpgIMG_20231004_084434_732.jpg
 
Last edited:
A couple of things I have realised on my 1st attempt at growing autos in my Mars Hydro 70x70x160 tent:

its not a problem with light leaking into the tent as it is with Photoperiod's.
I can have better air flow by leaving the vent flaps open all the time
Light leakage from the vents is far more than I initially realised, too many lost photons
My tent is getting old,
The mylar is parting ways from the outer layer,
The outer layer is getting hard and quite delicate.
The tear that happened while putting up the tent for the umpteenth time is just a sign of old age and me being heavy handed in tight spaces.

In view of these realisation's, I figured I can try a few things, make a few holes, run wires, pipes, fastenings through the holes etc, I mean, well, you know, its time for a new one anyway, might as well see what I can change, mess with, invent... and see if it works, all without ruining a new quite expensive tent.
I know, It's bloody ugly and damn cheap, but it seems to be working.

I used 1 bottle per pot, because its easier this way to be sure that all pots are getting the same/correct amount of water,
Rather than a single 5/10 liter bag or a pump feeding to all 4 pots from a single source, blockages, buildups of gunge , different plants needing different amounts at different times etc are a thing to be dealt with as and when, a single source for all 4 pots just doesn't offer the same assurance, in my minds eye.

I had a system with the bottles inside the tent for the two rear pots/plants (old age and back issues) which meant I had to be very carefull about splashing water on my lamp. every time I watered.

i guess it would look a lot neater with hanging bags on the wall, but, what the hell, use what is available, reuse old stuff as much as possible, Once its a proven system, maybe then I can upgrade the parts, but, I said that about my last system using bottles in the tent, and it lasted for years...

:baked:

Maybe I will opt for a new tent and 4 pot hydro pro system next, or in a few more years........... or..........or.....


IMG_20231006_093637 (1).jpgIMG_20231006_093716.jpgIMG_20231006_093723.jpgIMG_20231006_093732.jpg
 
Last edited:
I am gonna say that things have been quite a slow start, but, I finally have 4 seedlings planted 3 forbidden runtz and 1 gorilla cookie,
in cups 1 warped looking seed attempting to survive, two doornails.

I expect nothing from this attempt, but, hey, you never know,

main lamp is now on 4x CLU048-1212's @ 120watts +/-

IMG_20231007_095743.jpg
 
Last edited:
It took me quite some time to understand that the best way to start a bean, is to put the dry bean directly into an eazyplug starter cube, pointy end down. Place in a small plastic container in the dark and when the root is visible at the bottom I would plant the cube. Soaking beans to me is like the old story about the kid who asked their mother why they always break the end of the hambone before cooking... her mother did it, as did her mother, and the great grandmother finally simply said that it wouldn't fit into her biggest pot. That's how I feel about soaking, everyone does it so it must be best. There is absolutely no reason to soak beans and then unnecessarily handle the delicate roots.
 
It took me quite some time to understand that the best way to start a bean, is to put the dry bean directly into an eazyplug starter cube, pointy end down. Place in a small plastic container in the dark and when the root is visible at the bottom I would plant the cube. Soaking beans to me is like the old story about the kid who asked their mother why they always break the end of the hambone before cooking... her mother did it, as did her mother, and the great grandmother finally simply said that it wouldn't fit into her biggest pot. That's how I feel about soaking, everyone does it so it must be best. There is absolutely no reason to soak beans and then unnecessarily handle the delicate roots.

This is the 1st time I have soaked, simply because the usual way, (popping the seed in soaked compressed peat jiffies) didn't yield the usual results, which turned out to be my own doing.... so I tried what works for most people here.

My mistake, I am pretty sure, was that I was In a hurry and these "coco jiffies" had not fully expanded when I popped the seeds in, so The coco expanded after the seed was in and was too tight for the seed to grow.... well thats all I can think of tbh. I think the fact that the 3 seeds I soaked after this all popped and started proves the seeds were ok and that I did wrong...

As it stands I have 4 planted and two trying to survive after a little digging and loosening...and a total doornail, .learning curves can be pretty expensive at 11 euro a seed.. :baked:
 
Last edited:
another day another pic or two.

Seems a bit warm and a bit dry... will also raise the lamp a bit, just seems a little harsh on such small girls.

IMG_20231010_073126.jpg


Screenshot_20231010-073058_PPFD Meter.png Screenshot_20231010-084923_PPFD Meter.png
 
Last edited:
Current situation is not very positive...

However, A new plan is fomenting

New seeds, (coming from a UK breeder, will take a while to arrive, if customs don't stop them)
Then,
6, maybe 9 grow bags : 8 LITER 19 X 19 X 21 CM, 2-3 rows of 3
Use higher ratio Perlite to soil mix, current mix seems a little heavy and compact...

Start seeds in "peat jiffies", Rather than the coco jiffies I have been using this year (don't like them at all)

Plan on HST Scrog grow.
Top above 4th node,
So, looking for 6 horizontal spread branches to use up all available acreage, and two vertical from the central stem? possible? will find out I guess. 6 plants x 8 mains. = 48 mains in a 70x70, sounds like a plan.

in the meantime I will let these do what they can, see if they actually start to grow, worth a shot I guess, and just in case the new seeds dont make it to the door.

If all goes well though, i figure they have a week-10 days to show what they have, then I will have to decide how brutal I can be.

And if all else fails, I have some known "home grown" and "white Russian lady" photo beans as backup.
 
Last edited:
another day, a couple more pics
i dont know what to say really.. i was expecting more?
If these were photo's I would say they are spending time and energy putting down roots, maybe that's whats happening...

IMG_20231012_092802.jpgIMG_20231012_092752.jpgIMG_20231012_092810.jpg
 

2 weeks since popping for the forbidden Runtz & Gorilla cookies, 1 week for the 2 forbidden Runts 2nd attempt​


all 4 have now been 1 week under the 4x CLU048-1212's at 120watts.

there is 4 days difference from 1st 2 popping above the medium and the 2nd attempt.IMG_20231014_090642.jpgIMG_20231014_090648.jpgIMG_20231014_090704.jpgIMG_20231014_090717.jpg

And a couple of seeds 1x GC, 1x FR that are trying hard but not really getting anywhere, however, I feel it only right to give them some light and water, because they didn't give up,

IMG_20231014_090737.jpg
 
A couple more days, a couple more pics... slowly slowly.....

4-5 days between the rear two and the front two.

IMG_20231017_082259.jpgIMG_20231017_082252.jpg

IMG_20231017_082248.jpgIMG_20231017_082242.jpg
IMG_20231017_082234.jpg
 
12 days under the light, surprisingly I can see the 1st pistils on both plants, small as they are, So topped the back two, 1x FR, 1x GC, nothing more to say really, now just have to sit back and see how the branch's grow and take it from there.

IMG_20231019_080333.jpg IMG_20231019_080341.jpg
 
Last edited:

Blog entry information

Author
Corum59
Read time
2 min read
Views
1,484
Comments
28
Last update

More entries in Indoor Grow Journals

More entries from Corum59

Back
Top